


Tool: reNgine – Optimal installation
reNgine is your ultimate web application reconnaissance suite, designed to supercharge the recon process for security pros, pentesters, and bug bounty hunters. It is go-to web application reconnaissance suite that’s designed to simplify and streamline the reconnaissance process for all the needs of security professionals, penetration testers, and bug bounty hunters.

Source: https://github.com/yogeshojha/rengine
In my opinion, reNgine provides a broader and more structured view of the target by presenting information in a graphical and organized manner. It integrates its own interface and logic as an ASM while incorporating a wide range of tools commonly used in hacking, pentesting, and bug bounty communities. Its capabilities include enumeration, OSINT, and vulnerability scanning, among others.
In this post, I aim to demonstrate how to achieve a more stable and optimized version of reNgine on a virtualized server (which could be a VPS, depending on the user’s budget). In the past, I have encountered several issues related to performance, installation, and maintenance. My goal is to share how I mitigate these problems from my own perspective.
If anyone has ideas or publications aligned with this topic, I will include them in the resources section at the end of this post. Additionally, it’s worth mentioning that reNgine has a comprehensive Wiki that can help you better understand the technical concepts or experiment on your own. Wiki: https://rengine.wiki/
Contents
- 1 Download and Install Ubuntu Server
- 2 Create a Virtual Machine
- 2.1 Steps to Create a Custom Virtual Machine for Ubuntu Server
- 2.2 Installing Ubuntu Server on the Virtual Machine
- 2.3 Steps to Set Up reNgine on Ubuntu Server
- 2.4 Create a Superuser for reNgine
- 2.5 Check reNgine Logs
- 2.6 Access the Web Interface
- 2.7 Verify reNgine Deployment
- 2.8 Automated Update and Start for reNgine Server to Improve Performance
- 3 Resources
Download and Install Ubuntu Server
For this installation, I will use VMware Workstation for convenience, but the process can be replicated on any other virtualization solution.
Let’s download Ubuntu Server from the following link (Ubuntu Server is also chosen for convenience):
Ubuntu Server Download
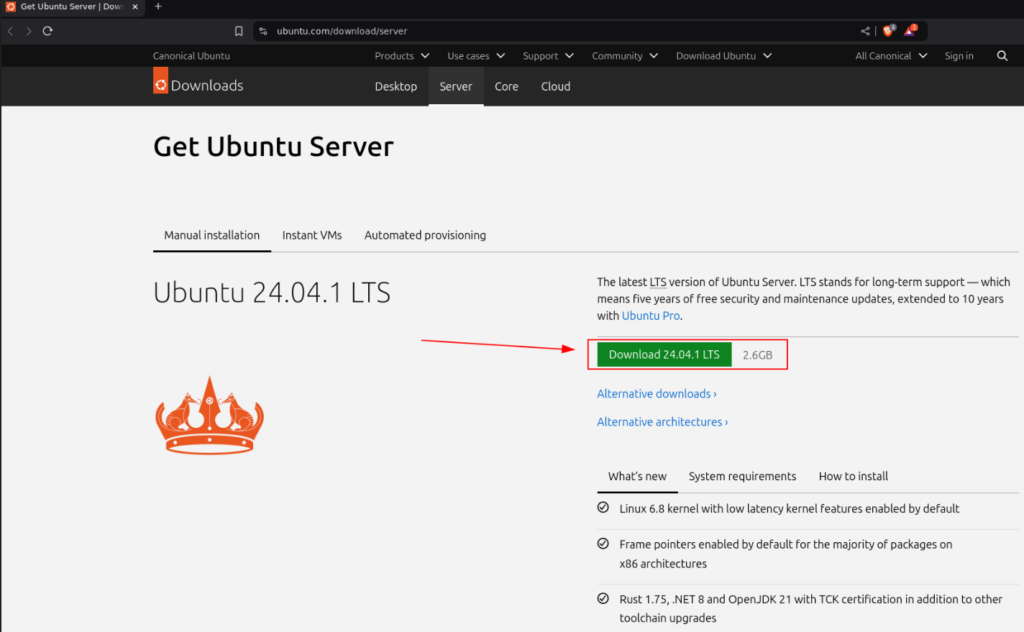
Once the download is complete, we proceed to create the Ubuntu Server virtual machine.
If you don’t have virtualization software yet, here’s how you can get VMware Workstation Pro (now free for personal use):
👉 Download VMware Pro (Follow the official tutorial)
VMware Workstation Pro – Now Free
Alternatively, if you already know how to download it, you can check this repository:
VMware Software Update Repository
Create a Virtual Machine
Create a new virtual machine using the Custom (Advanced) option.
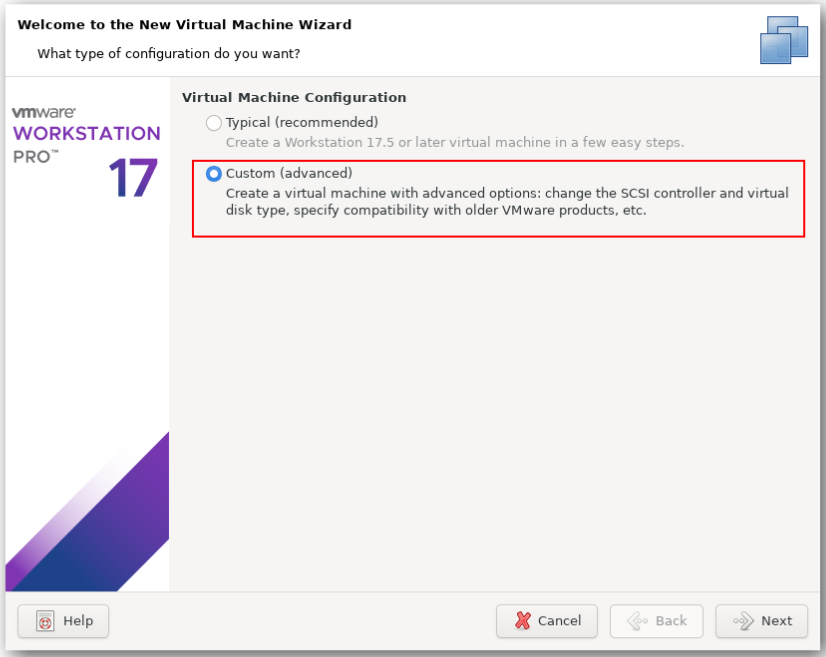
Steps to Create a Custom Virtual Machine for Ubuntu Server
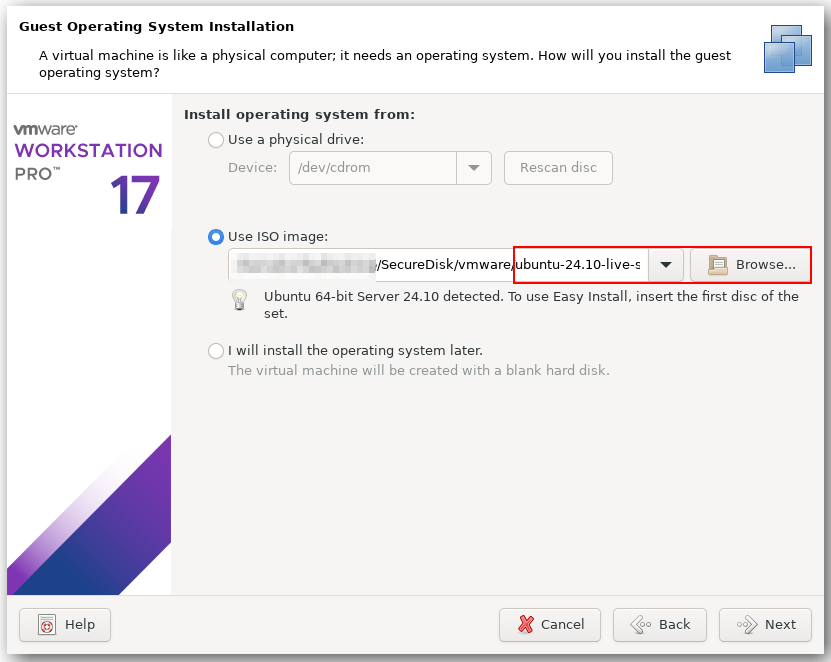
Select the Ubuntu Server ISO:
- In the Guest Operating System Installation step, choose “Use ISO image” and browse for your downloaded Ubuntu Server ISO.
- Once selected, the system will detect the Ubuntu version.
- Click Next.
Select Guest Operating System:
- Choose Linux as the operating system family.
- Select Ubuntu 64-bit for the version.
- Click Next.
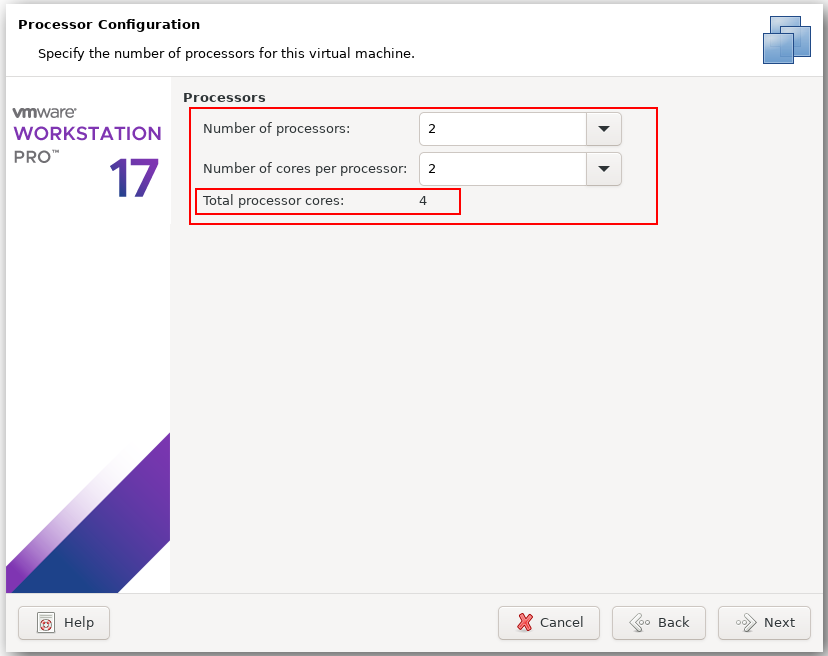
Configure Virtual Hardware:
- Processors: Set the total number of processors to 4 cores for optimal performance.
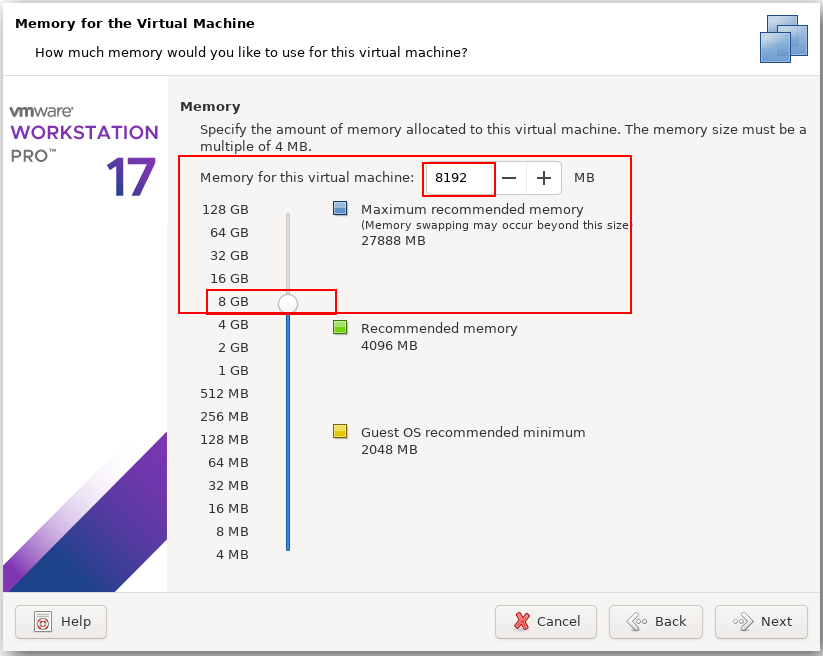
- Memory (RAM): Allocate 8,192 MB (8 GB) of RAM.
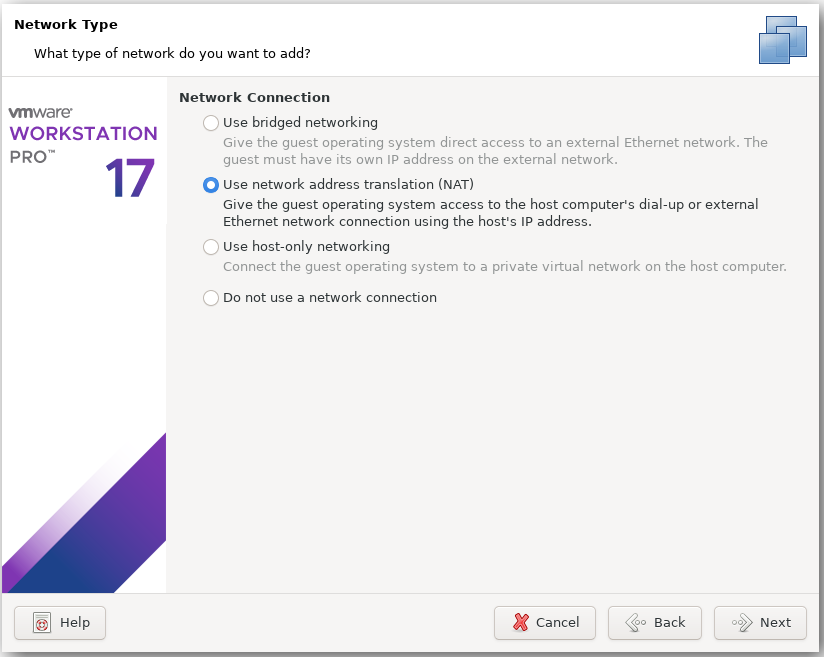
- Network Connection: Choose the type of network you prefer (e.g., NAT for shared network access).
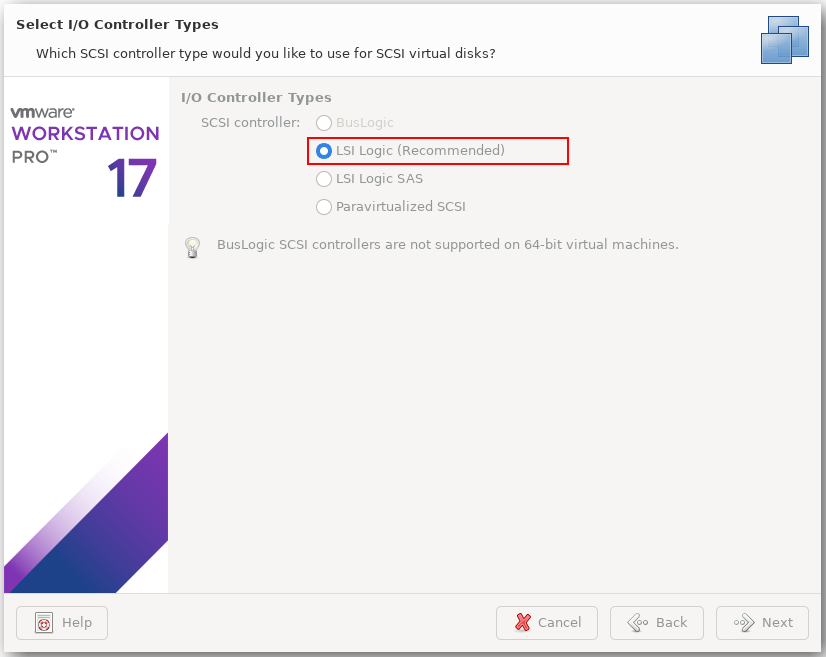
- I/O Controller Types: Select the recommended option (LSI Logic or NVMe).
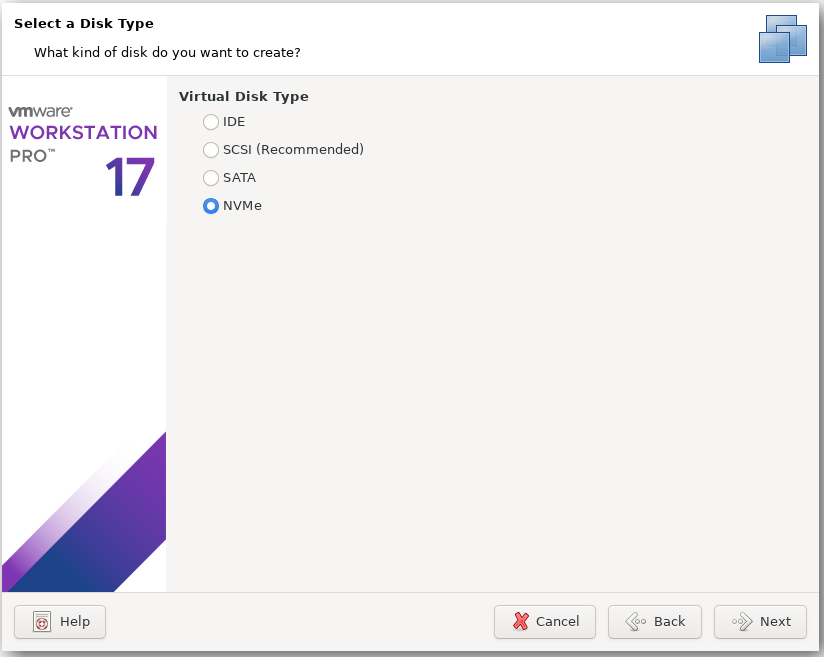
- Virtual Disk Type: Choose NVMe for better performance.
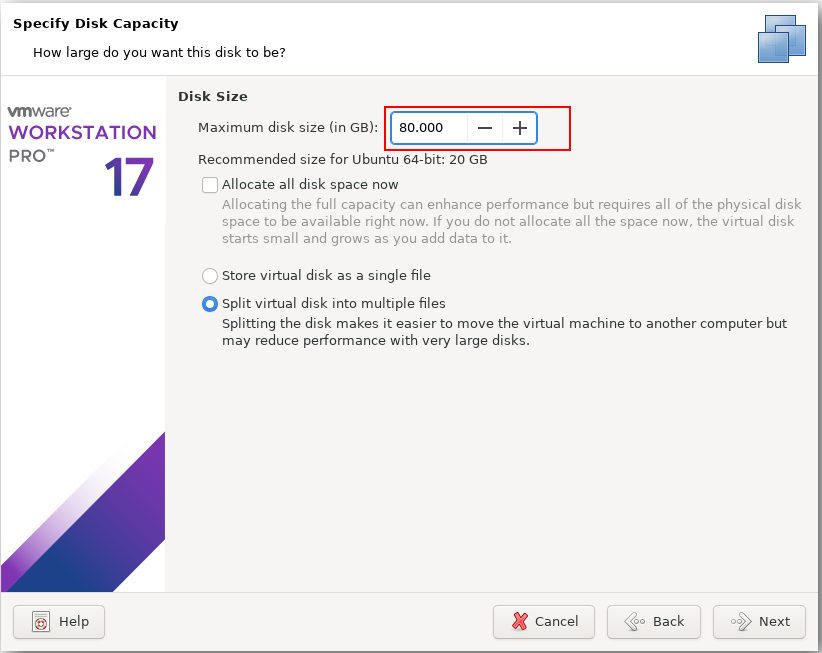
- Disk Size: Allocate 80 GB of virtual disk space. Select Split virtual disk into multiple files for flexibility.
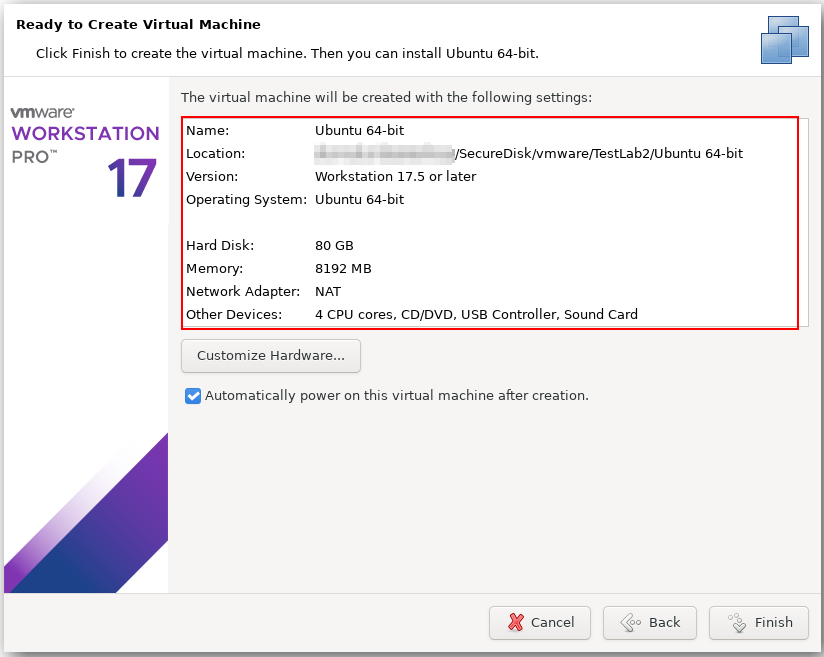
Finalize Configuration:
- Review the summary screen to ensure all settings are correct.
- The summary should look like the example shown in the last image.
- Click Finish to create the virtual machine.
Installing Ubuntu Server on the Virtual Machine
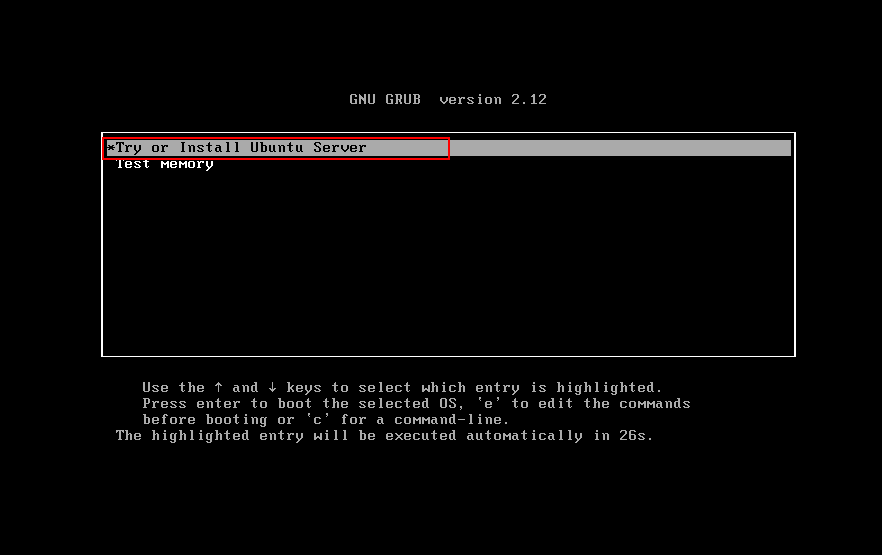
Start the Virtual Machine:
Once the virtual machine is created, start it. The system will boot into the Ubuntu installation interface.
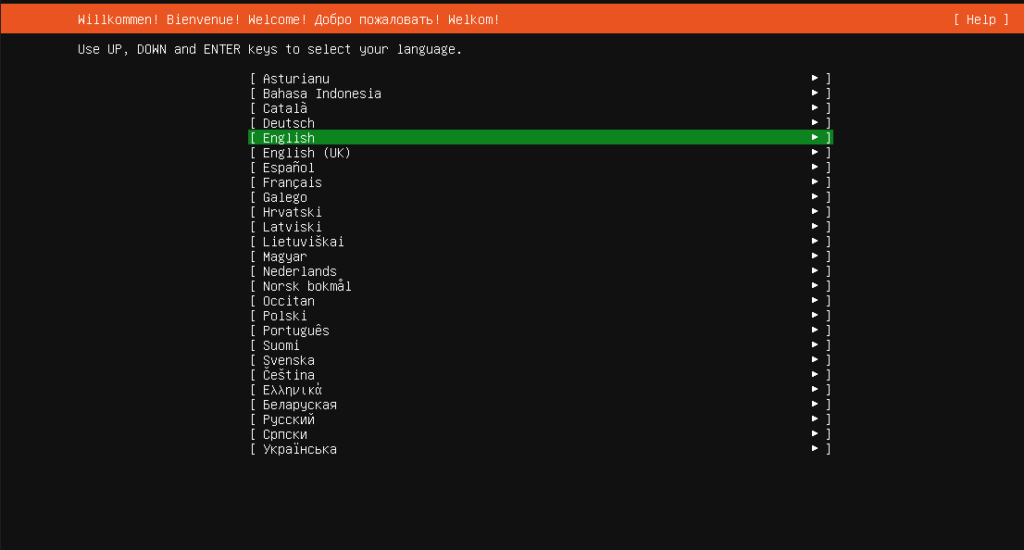
Select Your Language:
Use the arrow keys to select your preferred language and press Enter.
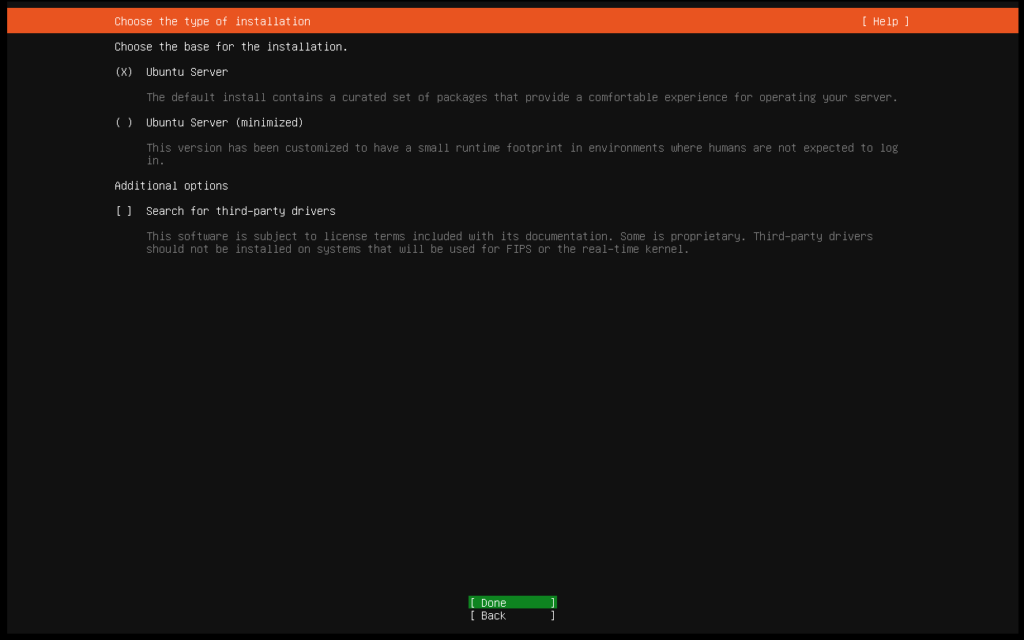
Choose Installation Type:
Select Ubuntu Server as the installation type. This option includes the standard set of packages for a server environment.
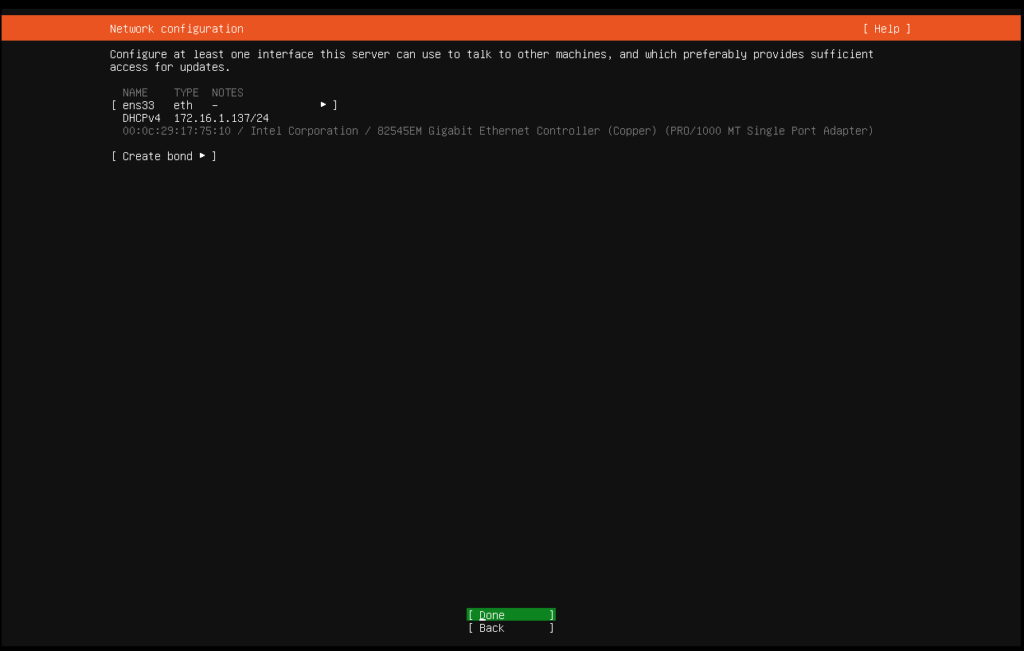
Network Configuration:
Leave the network configuration at its default settings unless you have specific requirements.
Guided Storage Configuration:
Select the default setup for disk storage. It will automatically partition the allocated disk space.
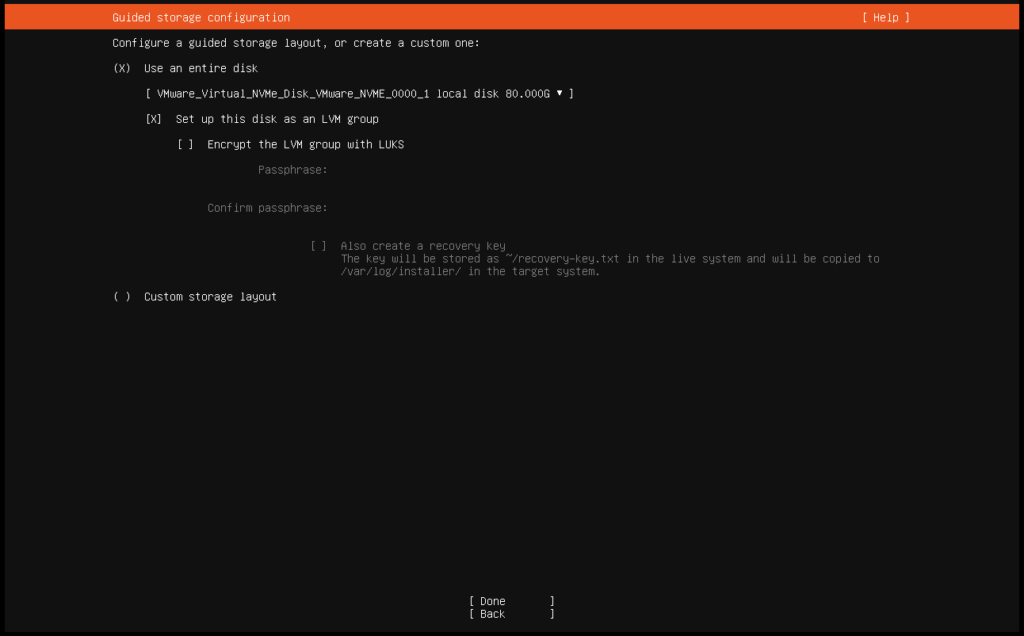
If you encounter disk space issues, it may be because the guided installation didn’t use the full disk. To fix this:
- Check your disk partitions:
lsblk - Verify available space in the volume group:
sudo vgdisplay - Expand the logical volume to use 100% of free space:
sudo lvextend -l +100%FREE /dev/ubuntu-vg/ubuntu-lv - Resize the filesystem to make all system space available:
sudo resize2fs /dev/ubuntu-vg/ubuntu-lv - Confirm the changes:
df -h
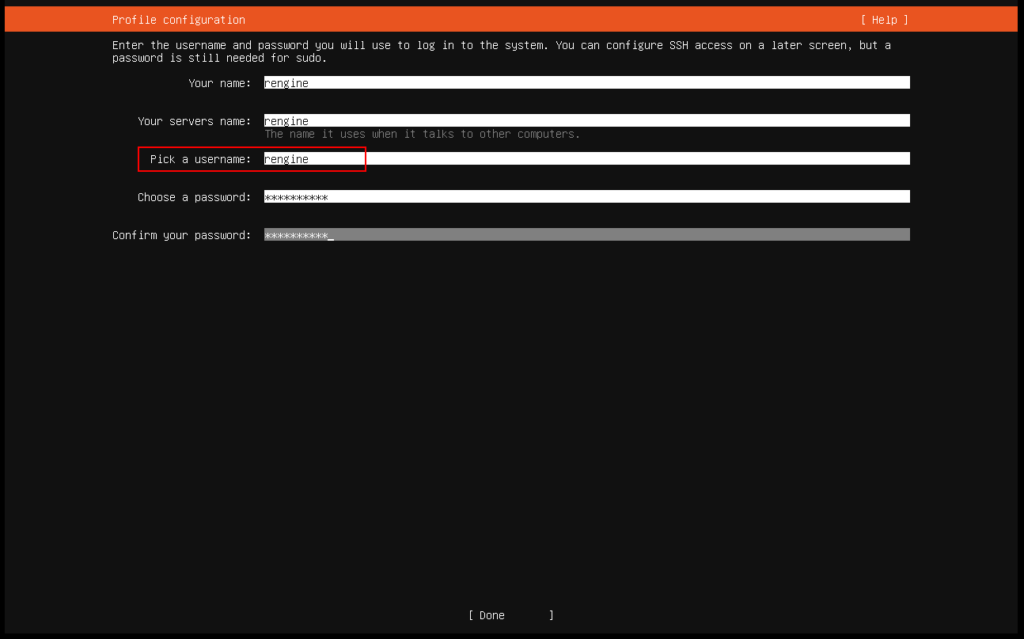
Set Up Your Profile:
- Enter your name, server name, and username.
- Create a secure password and confirm it.
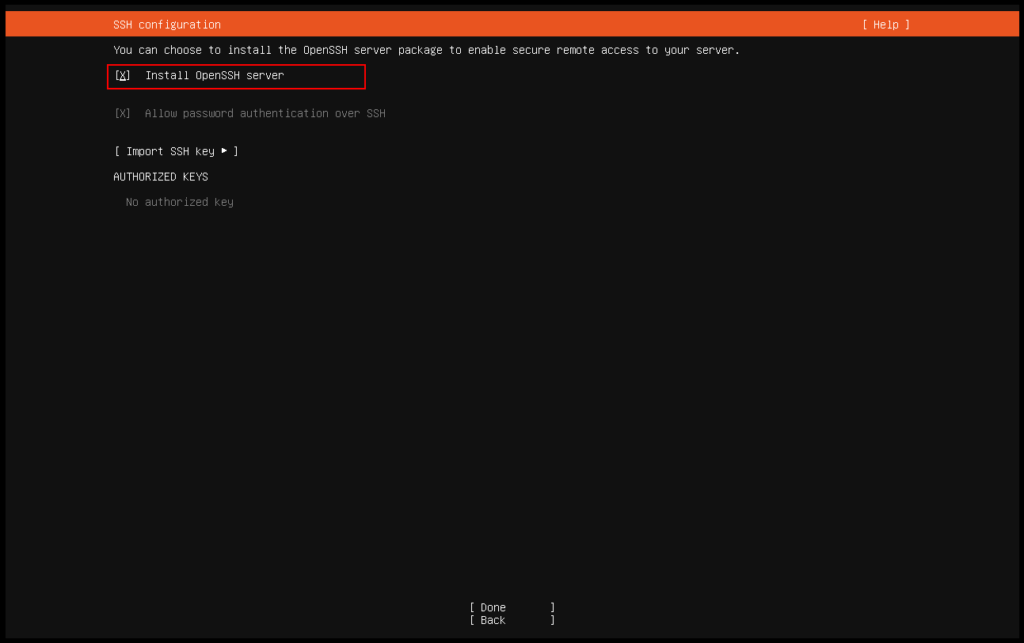
Install OpenSSH Server:
- Select the option to install OpenSSH Server. This will allow you to connect to the server via SSH for remote management.
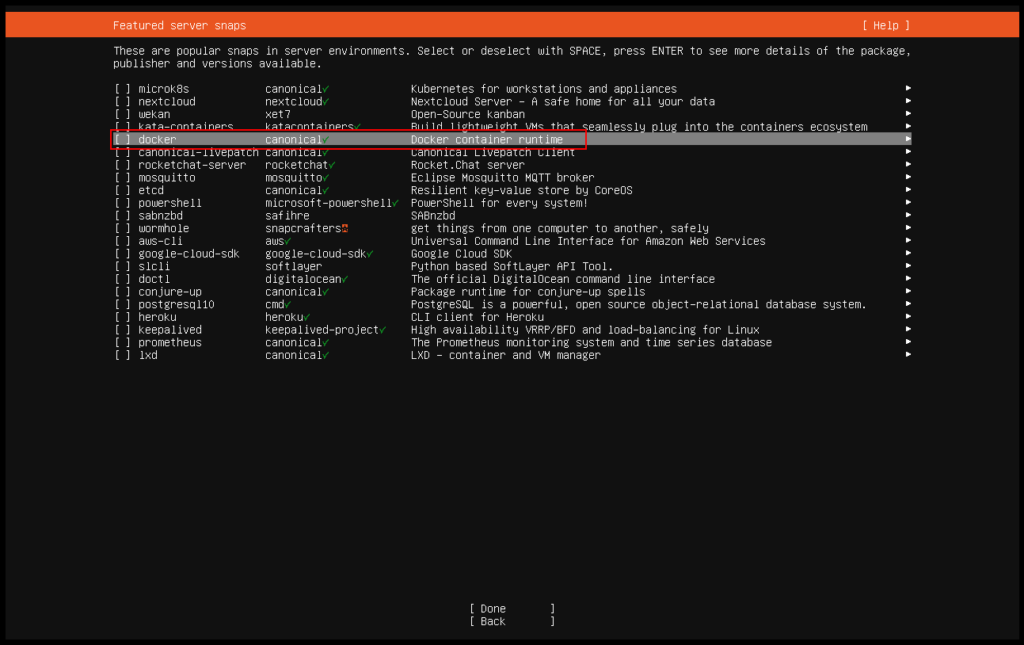
Optional: Install Docker:
- Choose Docker from the featured snaps to include in your setup. Docker provides containerization capabilities and is stable for server environments.
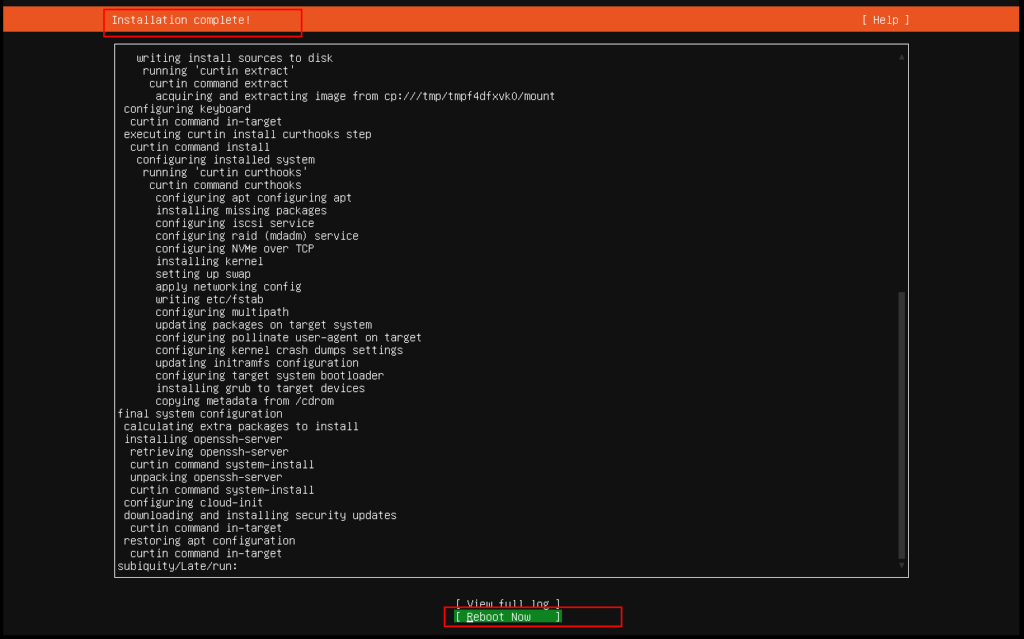
Complete the Installation:
- The installer will proceed to configure and install the selected packages.
- Once the installation is complete, reboot the virtual machine.
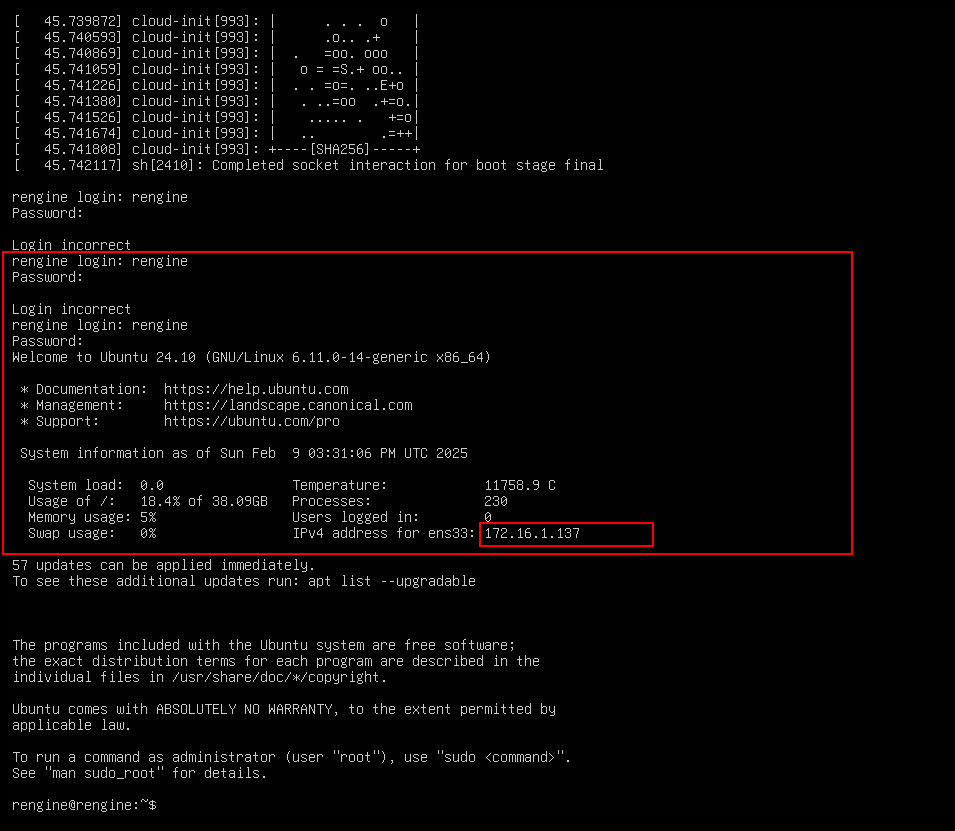
Post-Installation:
- Log in with the username and password you set during the installation.
- To check the IP address of your virtual machine, use the command:
ip a
Steps to Set Up reNgine on Ubuntu Server
Connect via SSH
From your host machine, connect to the Ubuntu server using SSH: ssh [email protected] (Replace 172.16.1.137 with your server’s actual IP address).
Update and Upgrade the System
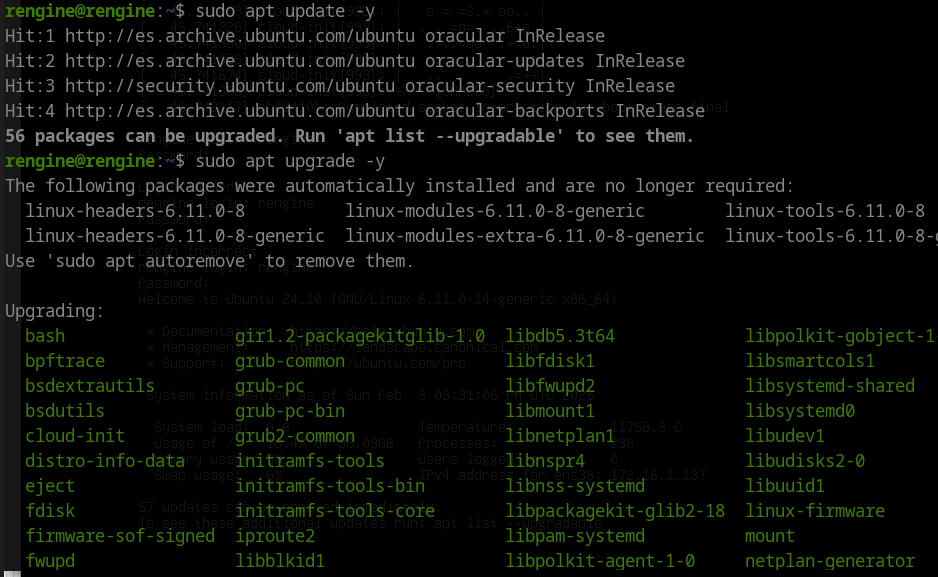
Update the system packages to ensure everything is up-to-date:
sudo apt update -y
sudo apt upgrade -y
Clone the reNgine Repository
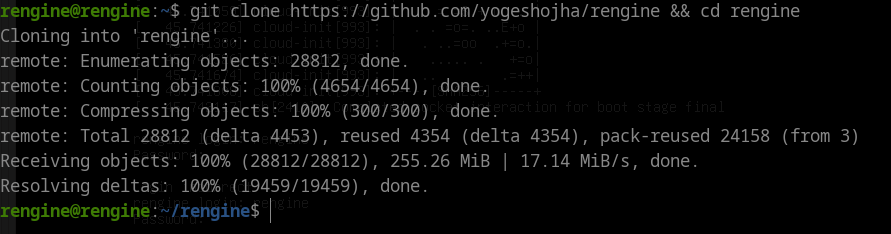
Download the reNgine source code from GitHub:
git clone https://github.com/yogeshojha/rengine && cd rengine
Edit the .env File
Open the .env file to modify the necessary configurations:
nano .env
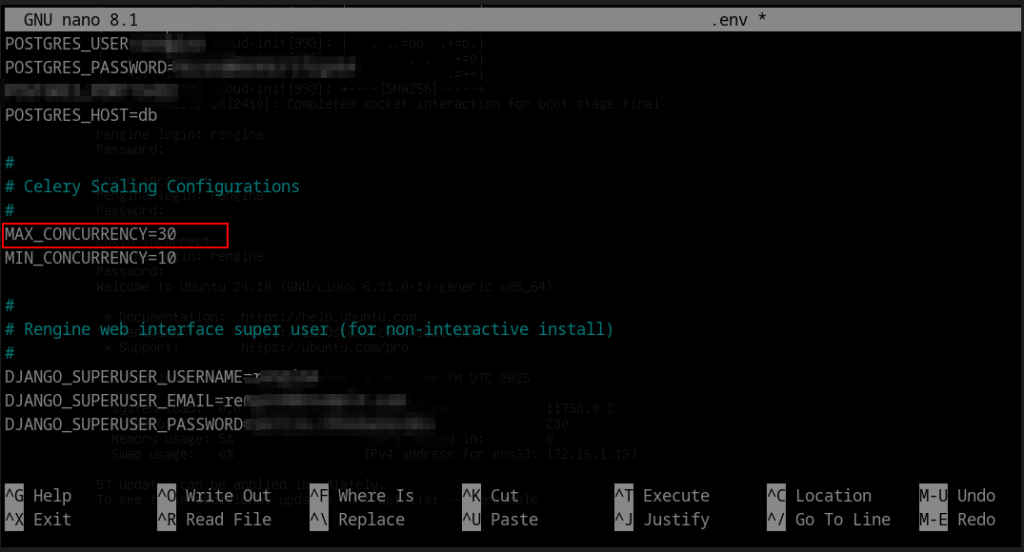
- Configure secrets: Change the default passwords for security.
- Adjust Celery concurrency based on your server’s RAM:
- 4 GB RAM:
MAX_CONCURRENCY=10
- 8 GB RAM:
MAX_CONCURRENCY=30
- 16 GB RAM:
MAX_CONCURRENCY=50
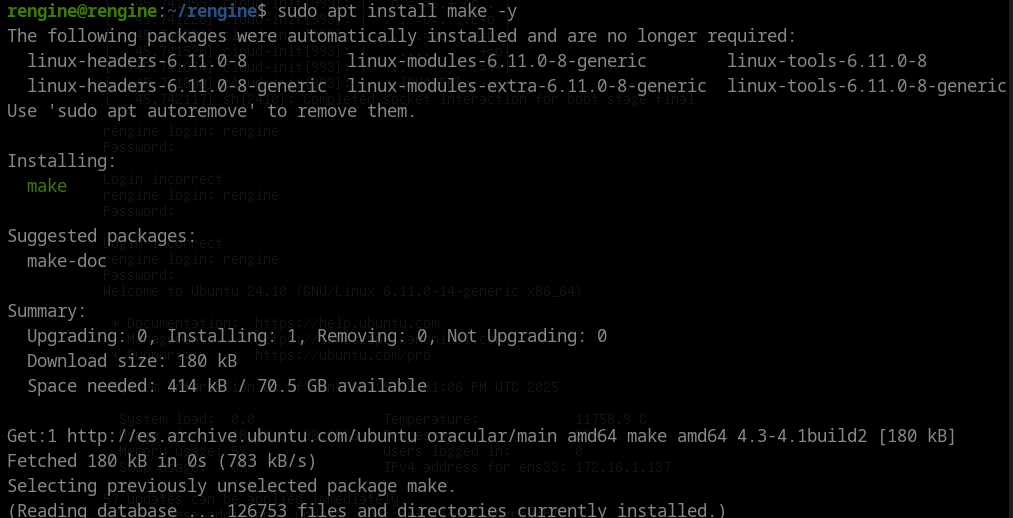
Install Dependencies
Install the make tool, which is necessary to build and configure the environment:
sudo apt install make -y
Generate SSL Certificates
Generate SSL certificates to enable secure connections:
sudo make certs

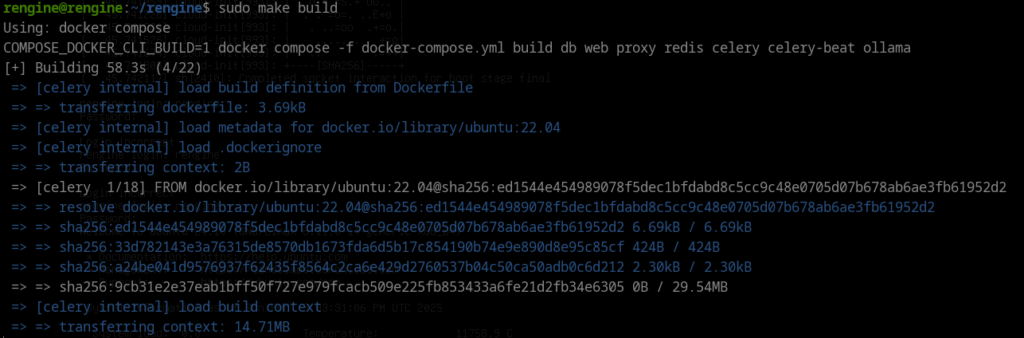
Build the reNgine Environment
Build the reNgine environment using Docker:
sudo make build
Note: This step may take some time depending on your network speed and server resources.
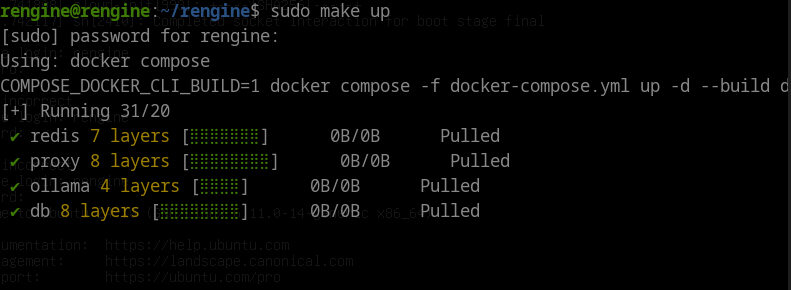
Start reNgine
Once the build is complete, start the reNgine services:
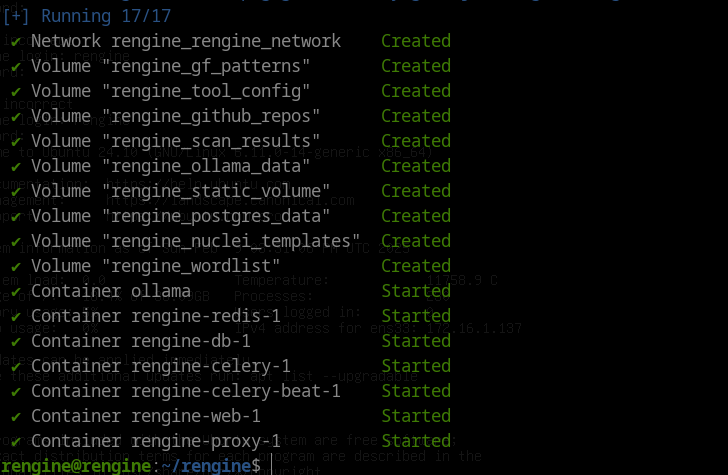
sudo make up
This will start all the necessary containers (database, frontend, backend, etc.).
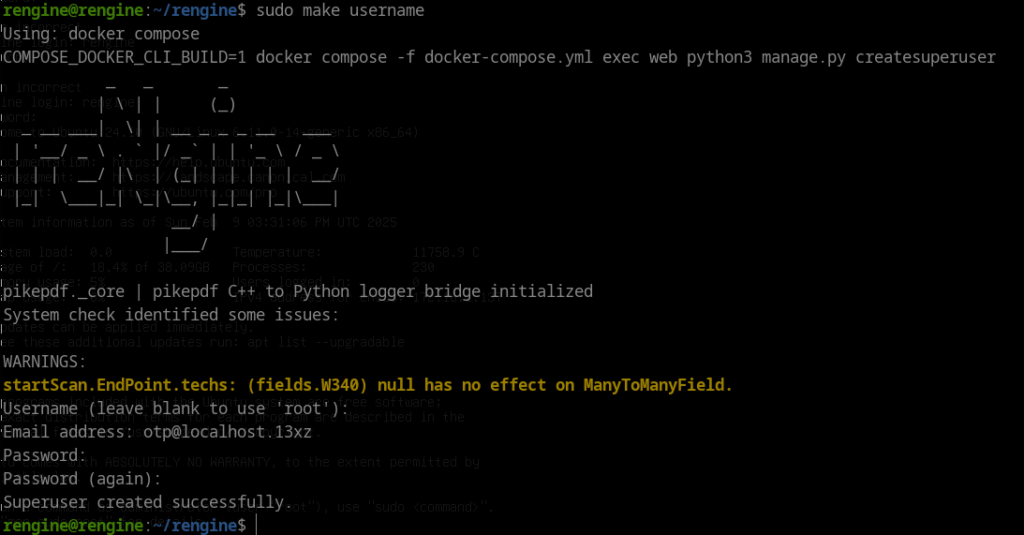
Create a Superuser for reNgine
To access the reNgine web interface, you need to create a superuser:
sudo make username
- You will be prompted to provide:
- Username (leave blank for
root). - Email address.
- Password (and confirm it).
- Username (leave blank for
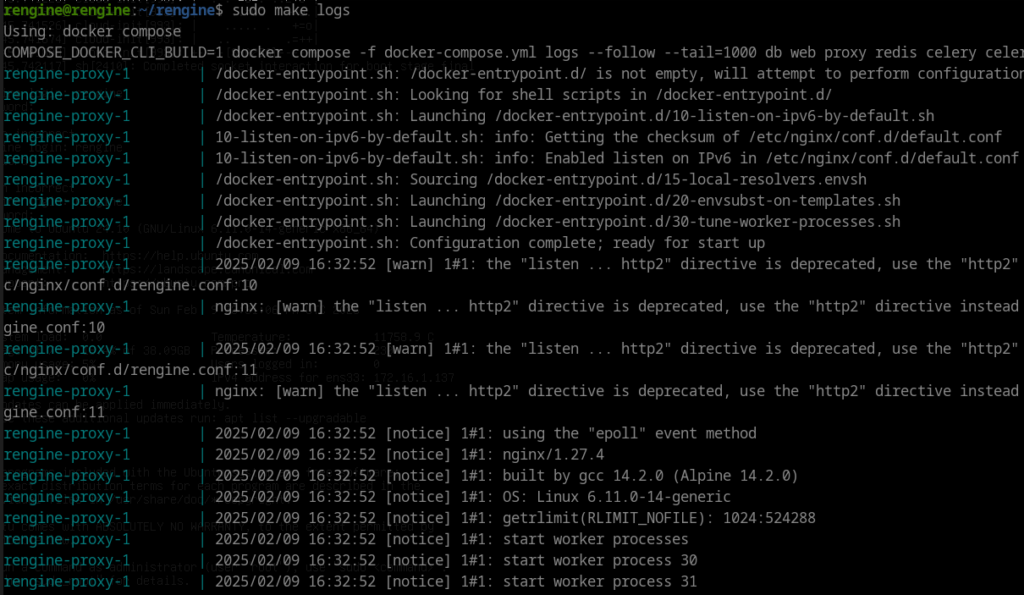
Check reNgine Logs
You can verify the status of reNgine services by checking the logs:
sudo make logs
- This will display the current state of all running containers, including any warnings or errors.
Access the Web Interface
- Open a browser on your host machine.
- Enter the IP address of your server (the same used for SSH), prefixed by
https://.
Example:https://172.16.1.137
- If you encounter a security warning due to the self-signed certificate, click Advanced and proceed.
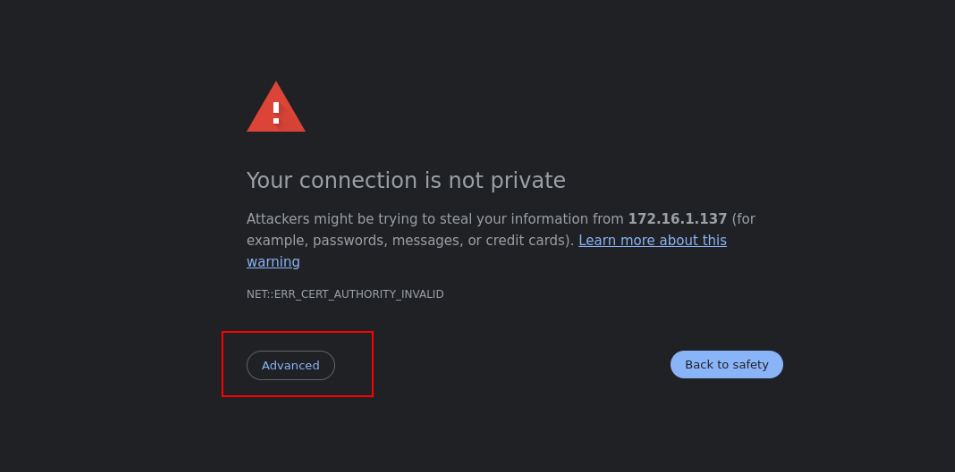
- You will be redirected to the reNgine login page. Log in using the superuser credentials you created earlier.

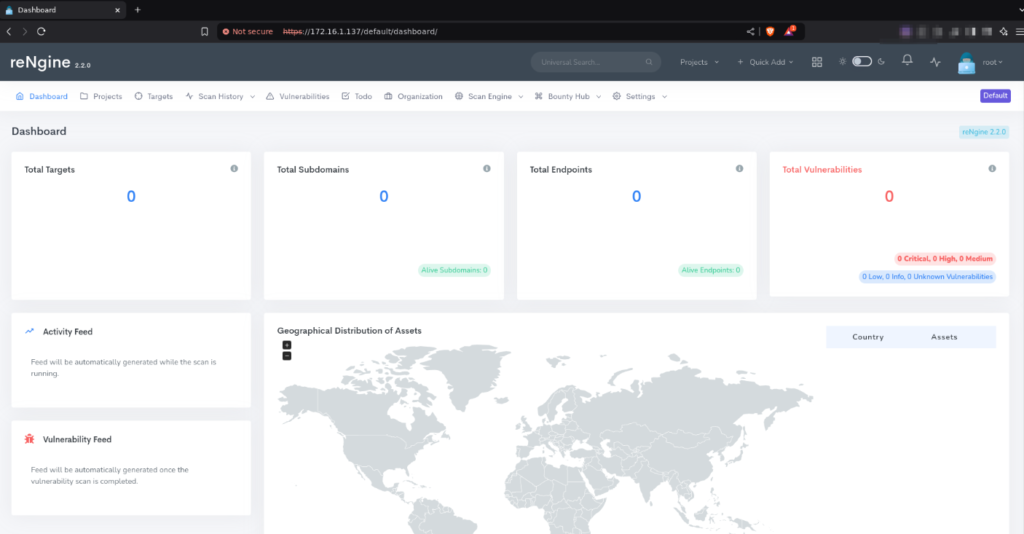
Verify reNgine Deployment
After logging in:
- Navigate through the reNgine dashboard to ensure all features are functional.
- You can start testing scans or configurations based on your requirements.
Automated Update and Start for reNgine Server to Improve Performance
To ensure the reNgine server automatically updates and starts on every reboot, follow these steps:
Make update.sh Executable
chmod +x /home/rengine/rengine/update.sh
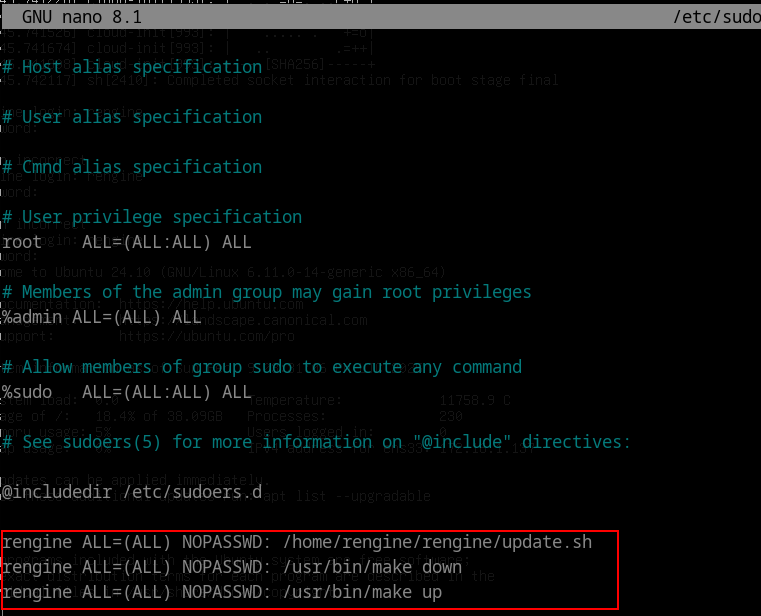
Add Privileged Commands
Open the sudoers file to allow certain commands without a password prompt:
sudo visudo
Append these lines at the end.
rengine ALL=(ALL) NOPASSWD: /home/rengine/rengine/update.sh
rengine ALL=(ALL) NOPASSWD: /usr/bin/make down
rengine ALL=(ALL) NOPASSWD: /usr/bin/make up
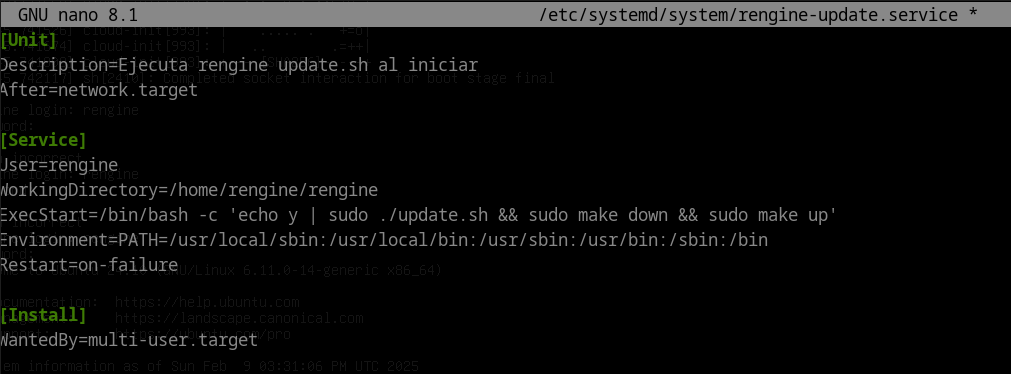
Create a Systemd Service
Create and configure a new service:
sudo nano /etc/systemd/system/rengine-update.service
Example content for the service:
[Unit] Description=Execute rengine update.sh at startup After=network.target
[Service]
User=rengine
WorkingDirectory=/home/rengine/rengine
ExecStart=/bin/bash -c 'echo y | sudo ./update.sh && sudo make down && sudo make up'
Environment=PATH=/usr/local/sbin:/usr/local/bin:/usr/sbin:/usr/bin:/sbin:/bin
Restart=on-failure
[Install]
WantedBy=multi-user.target
Enable and Start the Service
Run these commands to activate the service:
sudo systemctl daemon-reload
sudo systemctl enable rengine-update.service
sudo systemctl start rengine-update.service
sudo systemctl status rengine-update.service
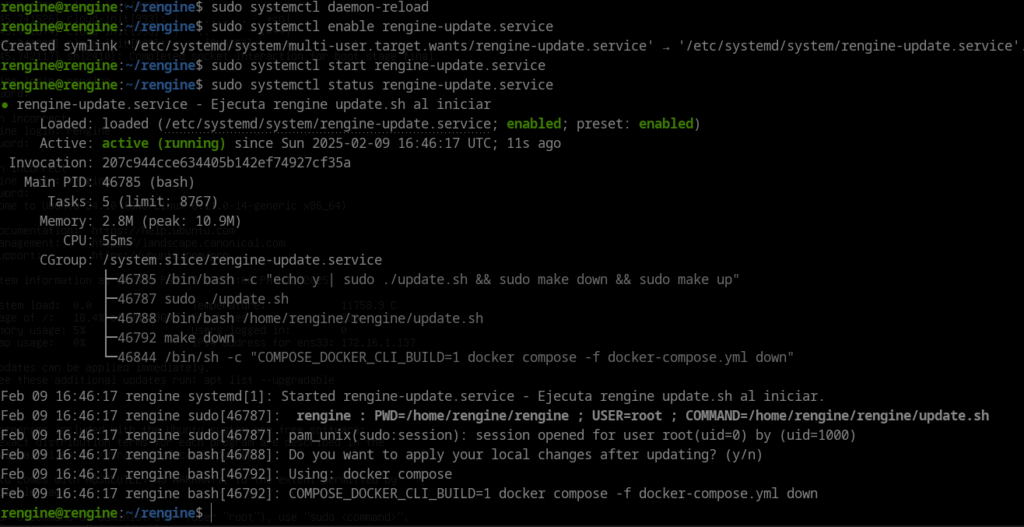
Now, every time the server restarts, the update script will run, reNgine will restart, and the system will be ready after a short wait. Just access it via the same IP address as before.
Important Notes:
- Production Security: Avoid using this setup in production environments since it automatically applies updates and grants passwordless privileges.
- Risks: Automated scripts may unintentionally break functionality. Always validate updates in a testing environment.
Resources
- https://github.com/yogeshojha/rengine – reNgine: The Ultimate Web Reconnaissance & Vulnerability Scanner 🚀
- https://www.youtube.com/watch?v=7OFfrU6VrWw – How to install reNgine – Automated Reconnaissance Framework by Secure the Cyber World